Explore the powerful features designed to elevate your business.
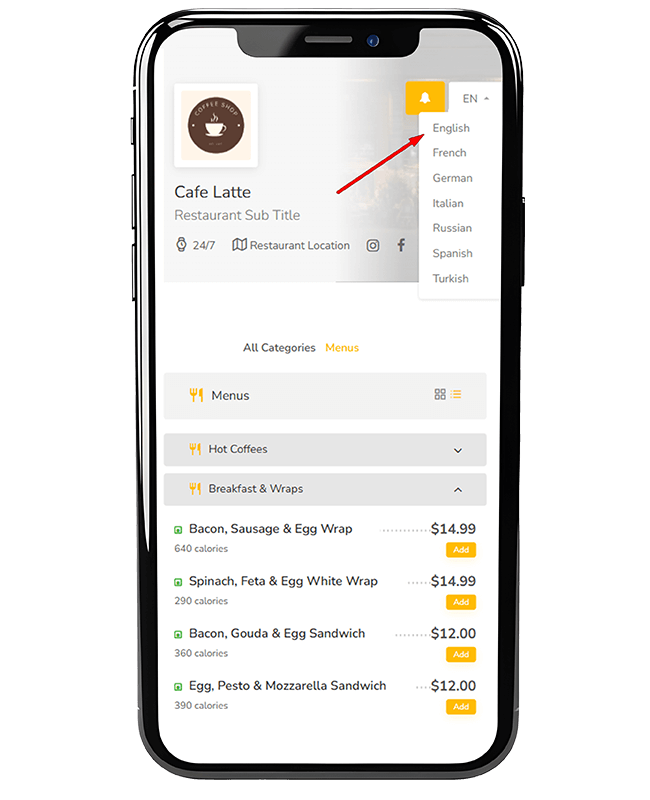
Easy Service with Language and Price Options
Offer easy service to your international guests with different language and currency options. Customize your menu according to their preferences for a faster and more understandable experience.
Language Options
Offer your menu in 21 different languages, ensuring that your customers can easily navigate and understand it, regardless of their native language.
Currency Option
Allow your customers to view prices in their preferred currency, providing a more convenient and localized shopping experience.
Simple and User-Friendly Design
Enjoy a sleek, intuitive design that makes it easy for both you and your customers to navigate. A hassle-free experience with a clean layout that enhances usability.
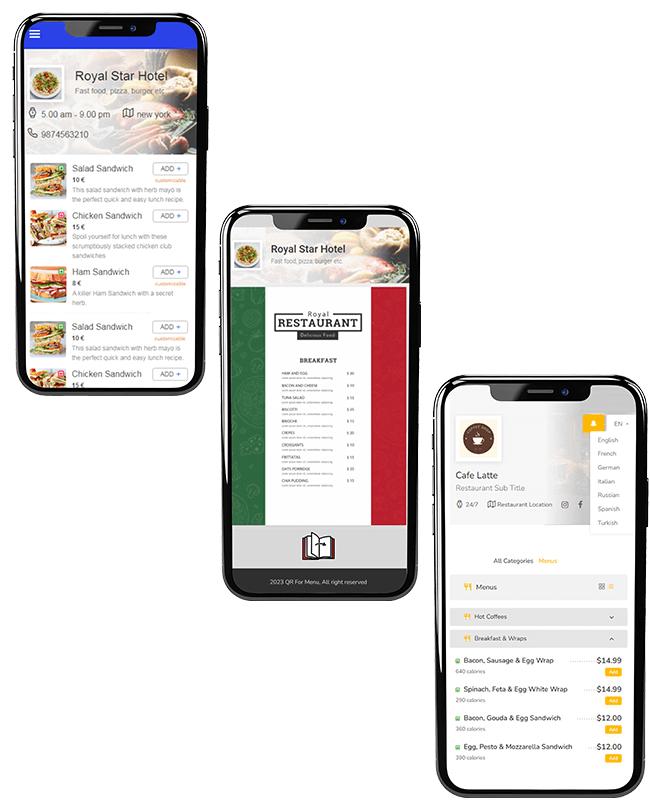
Advanced Theme Options
Choose from 3 different theme options to customize your menu’s look and feel, ensuring it perfectly matches your restaurant's style and ambiance.
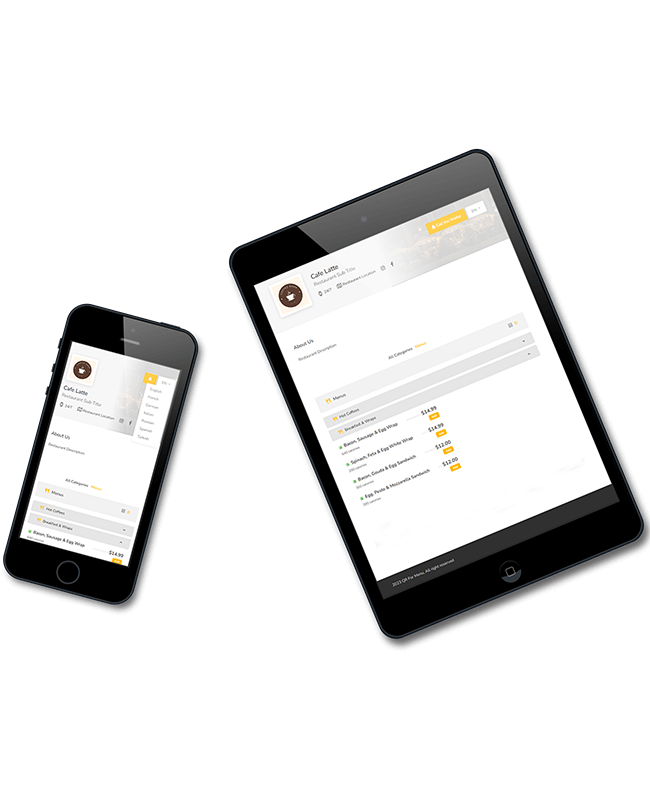
Mobile Friendly Theme
Ensure a seamless experience for your customers with a responsive, mobile-friendly theme that looks great and functions perfectly on any device.
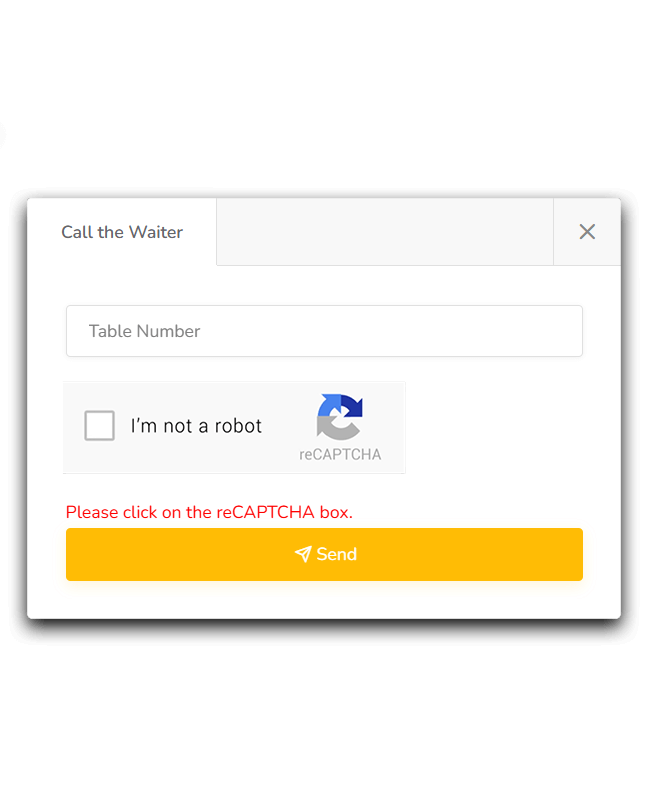
Call Waiter Feature
Enable customers to easily request assistance by using the "Call Waiter" feature, improving service efficiency and enhancing the dining experience.
Restaurant Management Panel
Easily manage your restaurant with a user-friendly management panel. Update your menu, track orders, and customize settings all in one place, ensuring smooth operations and improved customer service.
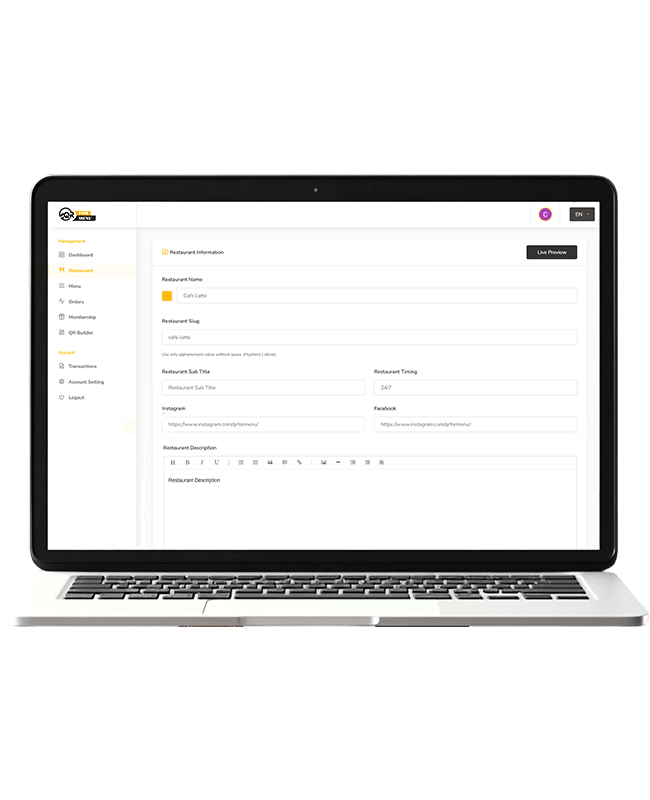
Adding Restaurant / Cafe Information
Easily input and update your restaurant or cafe details, including name, address, contact information, and opening hours, ensuring your customers always have the most accurate and up-to-date information.
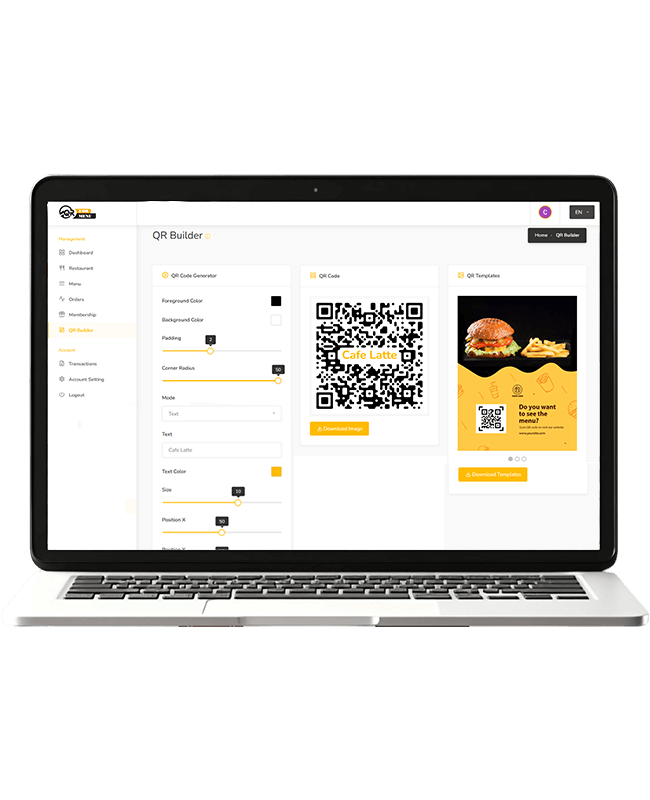
QR Code Editing Tool
Customize your QR code with ease using the editing tool. Adjust the design, colors, and logo to match your brand, and download it for easy placement at your restaurant or cafe.
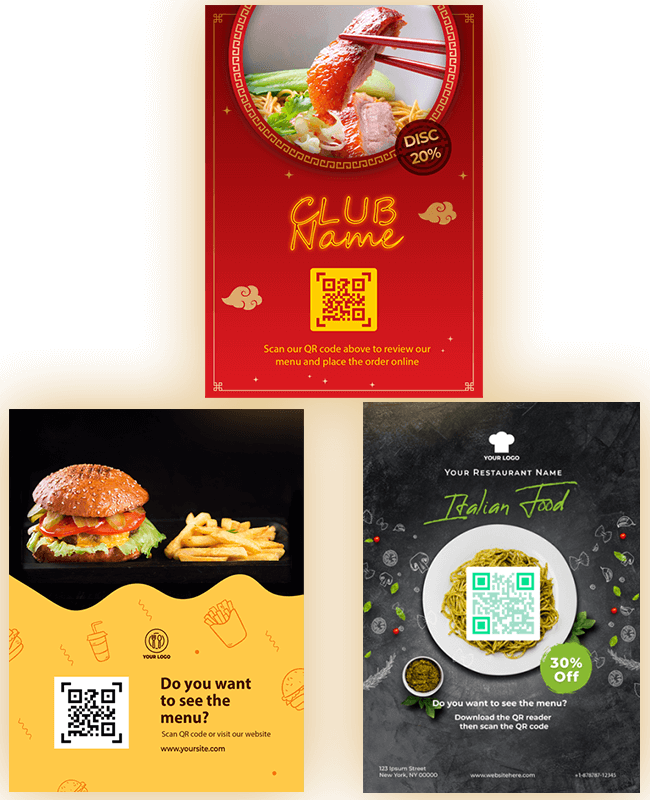
Free QR Code Design Options
We offer a variety of pre-designed QR code templates, allowing you to choose the perfect style for your business without any hassle. Simply select a design that suits your brand and get started instantly.
Ready to take your business to the next level?
Unlock new opportunities with our innovative digital solutions. Enhance customer experience, streamline operations, and increase efficiency with features designed to grow your business. Start today and see the difference!